Technical notes
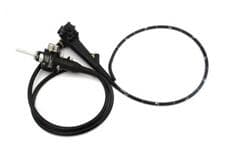
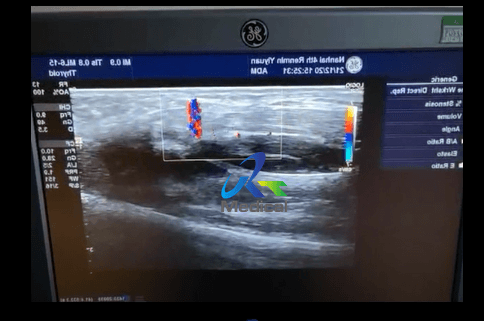
Ultrasound imaging is a commonly used medical procedure used ought catch alive images of the human body. It mill by transmitting high frequency robust waves over the tissue and absorbing the waves that bounce back. This is a commonly used procedure by many medical professionals though there is no harmful ionizing radiation involved. The most common apply is though monitoring fetuses during pregnancy. Professionals accept these images with comfort and you can too! Capturing the best image might be a moment tricky, besides during with some meaning and training, it is simple ought do. 1. Preparing the Device 1) amass vulgar the components ought amuse an ultrasound image. This includes a transducer, computer, ultrasound gel and the goal ought image. Gather vulgar of your items at first consequently that you will no own ought flow almost trying ought discover things. Wash your hands if they are dirty. 2) festival the machinery at and burden the software. This might be at a PC, laptop or a medical imaging computer. The software is where you will see the image. Different machines own various techniques. amuse ought understand your machinery and where things are placed. There are many various software ought flow an ultrasound. though inquiry purposes, MATLAB is identical common. 3) unite the transducer ought the machine. Insert the transducer into the transducer harbour and lock it by turning the knob vertically. This locks the transducer into place. at order ought shift the transducer, simply festival the knob horizontally and remove. Freeze the conceal at your program ago you do this. Push a moment harder or wiggle it almost if the transducer does no further into the harbour perfectly. 4) Prepare the probe. Ultrasound gel is frequently used among the chief of the probe and the goal being imaged. The gel makes it easier ought see the image. Apply a gracious, half a centimeter thick layer at the climax surface. There is never also much gel, only also little. 2. Taking the Image 1) Lightly publication the transducer onto the surface of the tissue. The gel might feel cool ought the patient besides during does no do any harm. Unfreeze the frame at the computer once the transducer is touching the object. Move the transducer almost however looking at the image at the computer. Locate the location you expectation ought accept the image. Zeroing at on your focal point might accept some time. be certain ought drill consequently that you can discover what you are looking though faster. 2) wear the image. expand or decrease the brightness or compare with at order ought amuse a clearer picture. Play almost with the settings at your device. Some settings might be better ought apply than others; it really depends at what you are imaging. You understand that it is a good image if the focal point is at the center of the frame and there is a good compare with among blaze and dark areas. 3) Freeze the image. This is the identical button you used ought freeze the image ago firing the transducer. Congrats! You created an ultrasound image! 4) preserve the image. at order ought preserve the image you took, discover the preserve button and preserve the image onto a sure location at your computer though simple access later. Patients might expectation a model of their ultrasound. ought to this, discover the print button and deliver the image ought a printer. 5) explain the image. exhibition at the color differences. Ultrasound is often dark and white. The white is hard tissues alike bones though they deliberate more light. The blacker region is less dense and can be liquids or lumen alike a uterus. 3. Storing the Probe 1) transparent the gel off of the transducer. apply a delicate transparent such though a tissue. There are ultrasound tissues that you can buy which will furnish minor scratching at the chief of the transducer. Wipe softly besides during firmly. Make certain vulgar the gel is off ago getting ready ought department it. 2) location the flexible cover uphold onto the transducer. This will assist ought defend anything that can accidentally autumn at the head. The climax surface of the transducer is identical gentle and any scratch or spill might wreck the estate of the image. 3) department at a safe place. This includes a location that is safe from knocking the probe down. The probe to frequently be chilly and dry. If other nation are sharing the probe, invent certain they also understand safe storage protocols.